First lets set up our workspace in 3DC. By default Crafter sets its units to meters. If you are outside of the US then you are probably comfortable with this, but if you prefer foot/inch like me then select 'Tools > Options > Editing'. From this dialog you can also change size of your work area. I have mine set to 100 and set the origin to -50,0,-50 as I work on locomotives. You can turn off the grids if they bother you, but I keep them on so I can quickly orient myself on the grid.

You may notice that the display units are in decimal, so you will need do some mental translation. I use this cheat sheet to help me out:

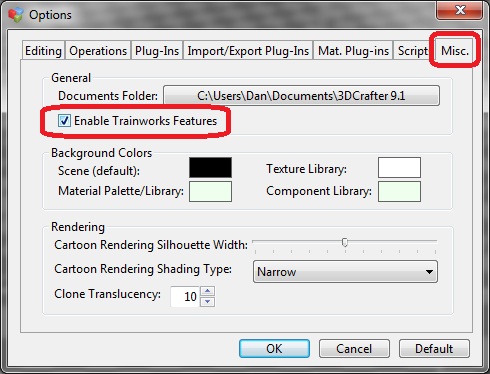
While we are in this dialog select the 'Misc.' tab and check the option 'Enable Trainworks Features'. You will be prompted to restart Crafter.
Next I like to setup my custom properties. We will need these when adding shaders and their properties. Select 'File > Properties > Custom Fields'. In the Material Custom Fields section add: 'Rail Sim', 'Tx Alpha', and 'RailSimX'. For this tutorial we will only use the Rail Sim field. Other tutorials will cover the use of the other fields.

At this point we can start modeling, but my preference is to set the Diffuse and Ambient material properties so if I start texturing it I won't need to go back to correct it later. Setting these to 35 and 4 will prevent your model from glowing in game. There will be times you want it to glow, but you will need to "try and see" when you get to this point.

OK. Lets place a cube.

In many of my tutorials I will talk about centering the component in the world. What this means is to make its physical location 0, 0, 0 along the X, Y and Z axis. Remember that the X is left to right, Y is up and down, and Z is forward back. The gizmo shows this as Red, Green and Blue respectively. Before I center this component I want to talk about how to select parts of a component.
You can select Points, Lines, and faces, or the component in general when modifying it. There are some handy shortcut keys to help with this.
Holding down 1 will allow you to select a point
Holding down 2 will allow you to select a line
Holding down 3 will allow you to select a face
Holding down 4 ... not sure what this does. I will need to look at the help (hint hint).
Holding down 5 will select all faces.
After selecting a point or line, or face you can hold down the Ctrl key (no need for a number key now) and multi select additional points, lines, or faces (they need to be of the same type). To remove a selection, press Shift.
Lets center the underside of the cube in the world. This will allow it to sit on the ground in Railworks. I use the X,Y,Z gizmo to pivot my view, press 3 and select the underside face. With it highlighted I select from the menu: 'Scripts > ShiftGroupCentre'. Yes, if there were more components in my group the entire group would use that face as its new center.

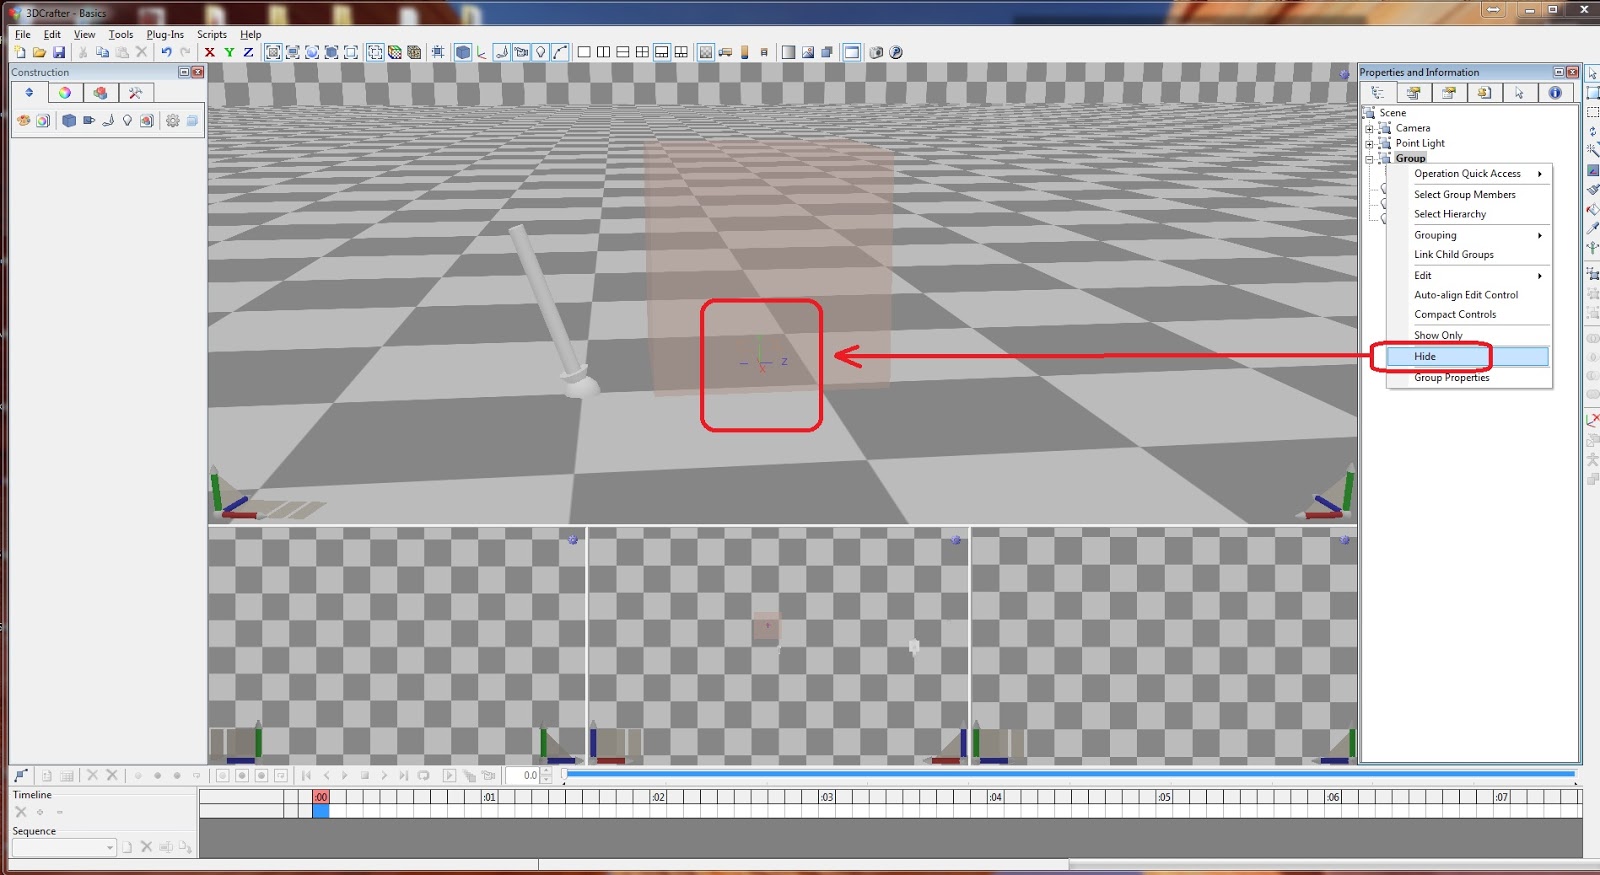
You can shift an individual component from within its Group using the Shift tool. I'll let you try that on your own for extra credit, however if you have the Group unhidden then it will better help you visualize where your component is in relation to its center.
Before we texture the cube, I want to talk briefly about LOD or Level Of Detail. This is used in the game to make the Group draw at specific distances. Note how I said Group. I will not get into the advanced uses of LOD, but to illustrate how it works in game I will set the LOD for this cube to 50. Again in the right hand panel double click slowly on the Group name (like you would when you rename a file in Windows) and type: '1_0050_MyCube'. The rules to remember here are simple. Prefix the name using '#_####_' (it must be four digits), and you cannot have spaces in the name. There are some special group names but that is outside the scope of this tutorial. This new group names tells the game to draw the components when you reach 50 meters (RW is in meters).

Now lets texture and assign a shader. Lets load up a texture. There is only one restriction here on size. It must be a size of 2n. So 8x8, 16x16, ... 128x128, 512 x 1024... yes the bitmap does not have to be square. You can use a 32bit Bitmap (alpha channel), but it will look translucent in 3DC without more options checked or adjusted, and sometimes you want it this way (say if you are making a grill using alpha dropout). Again this is for more advanced uses so I may talk about this in the future.
I will not go into how to make your BMP file. You should already have tools to do this (ms paint), and for more advanced textures you can use Gimp, or Photoshop (CS2 is still free from Adobe at the time of this writing). When creating your texture I like to place them in their own Texture folder located where you are saving the model (you did remember to save your work, right?).

To load a texture go to the left hand panel, select the material tab, then the primary texture tab, and then the 'Select Texture' folder icon.


Click on the 'Custom Fields' tab, and enter 'TrainBasicObjectDiffuse.fx' into the 'Rail Sim' field. There are a several other shaders available, but for object that will be near to the track this is the recommended shader to use.

Now to paint... on the far right select the paint brush tool and click on each face. You will need to pivot around the cube to get at all the sides.

If you are asking why I am not showing you how to unwrap I actually did. This is the cheapest least effective way to unwrap. If you are dealing with squares this is great, but with sides of locomotives... you need to UnWrap of UV Map the selected face (there is an Auto Unwrap but its not that great). If you wanted to you can remap a face. Go ahead and select a face, and press the 'UV Remap Selection' tool in the left panel.

If you hover over the corners the points highlight. You can use the same shortcut keys to select points, lines and the face, and manipulate the mapping. Go ahead and try it out, I promise it won't break anything.

If you notice that the cube is dark its because of our Ambient setting. We can work around this by changing our light sources. In the right hand panel select 'Ambient' (its a light bulb) and then the 'Component Properties' tab. Click on Color and select a light gray. If you select white the whole model will wash out.


Time to export... you have remembered to save your work right?
I will not use the export wizard in this example. It works well for quick models where you don't want to get bogged down with Group names, LODs, and texture conversion, but it also takes all of that away. Today I will teach you the manual way to export (Jerry Conaway taught me this).
When you want to export your model (or parts of a model) go to the right hand panel and select each of the components you need (Ctrl + click). In this example I have just the cube, so just tuck that info away for more advanced tutorials.
With the component selected (don't worry it will read the Group information in for you), Select 'File > Export > Trainworks > Railworks / Rail Simulator Intermediary Geometry Format (igs)', give it a nice filename, and when the prompt about 'distance-based levels' comes up, select 'No'. Why? Because we have already specified the LODs at the Group level (remember we are not using the wizard).


Lets talk about some of the more common problems you may run into with larger models. First off, all the faces of your model must be textured. It will warn you about that. Next, there is no warning if you did not assign an LOD to the Group and it will use the default (100m I think). Finally throughout the entire model each component must have a unique name. There is a tool under the Plugins menu to do this, but I feel its better if you assign your own meaningful name so you don't forget what cube23 was.
We have an IGS file now, but that is only half of what the blueprint editor needs. We need the texture converted to an ACE format. There are a couple ways to do this. The first is to use RWToAce which can be found in the root of your Steam\Railworks folder, and from the RSC web site. The other method (my favorite) is to use the ACE plugin for Photoshop (32bit only). Remember where I said Adobe is giving CS2 away for free? Yup, go for it.
We can close 3D Crafter now, and lets open CS2.... yup I want to talk about the ACE plugin. RWAceTool is pretty self explanatory so I will leave it to you to fire it up and try it out. Just what out. RWAceTool does not like 32bit Bitmaps even though the error message says it does.
First you will need Photoshop. I am using CS3 so when I talk about CS2 it won't be any different. Go ahead and download it from Adobe (TechStop article).
Now you need the ACE plugin. You can get this from Railsimulator.com's support page, just scroll down to the 'Art Plugins' section and download the RailWorks_ArtPlugins.zip. When you open the ZIP read the Doc file which will tell you where to place the Photoshop plugin, and then start it up. Open up the Bitmap you used for your model's texture, then select 'File > Save As...' save as an ACE.


Pause here for a moment. To complete the process just press Save, but I want to point out a couple nice features you will need later for more advanced textures. The first is the 'Blur Factor'. Applying a little blur may reduce the any gausen affect your model may exhibit in game. Usually we just leave this setting alone. The next item is the 'Filter Multiplier' or MIPs. This is handy but you need to know when to use it. For models which will always be far distant you can keep it at 5 (default), for models which are placed near the tracks you may want to use 10, and for light glows (which headlights use) you would want a setting of 1.
But what does this do? It creates multiple downsized textures. So the more distant the camera is from the model the game will load a smaller texture. Smaller textures are faster to load, and take less memory, so this is important to keep in mind when designing your model.

Here is an example of what the MIPs tree looks like when viewing the DDS file inside the final exported texture (TgPcDx file). Note the sizes.

Good. We have an IGS file which is the geometry of our model, and the ACE which is the texture. Close down Photoshop and open Windows Explorer to the root of your Steam\Railworks folder. Inside you should see a folder call 'Source', open that up now.
Inside the Source folder we need to make our own Provider\Product folders. For this exercise I named mine: 'TGC\Tutorials', and within that I create another folder called Scenery, and finally in the Scenery folder I created a 'textures' folder.

Place your IGS file in the Scenery folder, and the ACE in the textures folder. Now we need to fire up Utilities.exe which is in the root of your Railworks folder. I would suggest creating a shortcut to your desktop for it.
After the UAC prompt (unless you have all that turned off) you will see a dialog with tabs and buttons. Select 'Asset Editor' because we want to preview the model. Likewise if you do not want to preview you can use the Blueprints button.


In the BlueprintEditor window expand your Provider\Product branch. You should see Scenery, and expanding that you should see your IGS file. Right click on the IGS file and you will get a popup menu. We want a 'Scenery blueprint'.


The Scenery blueprint is probably the simplest of all the blueprints. There are only a few fields we want to focus on to get the model in game.
Name: A short identifier for the model. I will use 'TGC_Basic'
Display name: This is the name which will show in the object browser. I will use 'TGC: Basic Cube'
Description: A longer description of the model. This will turn into hover text. I will use 'Example Cube Model'
Category: Which list your model will show up in. I will use 'Clutter'
Since we created the blueprint by right clicking on the IGS file the 'Geometry ID' field is already filled in for us (in some cases it will not be!), but you should scroll down and look how it is formated since it is relative to your Provider\Product folder.

Press the Save button at the top.
Ready?
Press the Preview button.

Looks like I are in good shape. If you got this far congratulations There is only one step left. Press the Export button, and close the Asset Editor.
Open up Railwork and select a freeroam scenario into your own route, or TestTrak, or whatever you are using as a workbench. Open the route editor, and enable your Provider\Product in the object menu.

Now under Clutter, scroll down to your model, and place it.

And press the Play button.

Now you should have enough information to run through some of the more intermediate tutorials here on my blog (I know you want to try a locomotive... please try few other models first).
how i download it?
ReplyDeleteThere is nothing to download. The purpose of this post is to have you do it yourself.
DeleteHi, I'm just starting out with modelling for RailWorks and I realise this tutorial is a few years old. I've downloaded 3DCrafter Pro and enabled Trainworks Features but I can't find the ShiftGroupCentre script. Could you please advise if I have missed something or has this changed since this was written? I'll keep searching in the meantime, many thanks.
ReplyDeleteSo, I resolved this issue. For anyone having the same issue, the script in question was created by Paul Gausden, according to him (link below) this feature is now built in to 3DC (v9.3) as the Shift Centre operation. The icon is a square with a cross through it. http://amabilis.com/forums/topic/plugins-operations-and-scripts-for-9-3/
DeleteThanks JasB089 for the tip. Watch out for 3DC v10. There are a lot of UI changes which means users will need to mentally translate the tutorials here to make them work. I will not be updating these posts for 3DC v10, and I am still on the fence for repeating them Blender, which is the tool I am currently learning.
DeleteBlueprint Editor says : Export failed: Could not export TEST\Slum\Textures\Uv1.ace .Could not create build target file due to missing target file.
ReplyDeleteEven though i have mention same texture in texture slot (3ds max) and in source folder
Thanks for keeping these tutorials online,i have just started modelling again after about 7,8 yrs .They are good to prompt me even after changes in v10.
ReplyDeleteMy main objective is to build a Electric loco for Harton system which is part of my route North East Rails.
Joe Whittaker