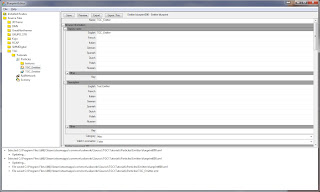
Aside to all this, and the topic of this post was that the SD7/9 was tied to the old Kuju US assets, which were soon monetized. MadMike and I made a pledge to Michael, to find a way to free his freeware creation, and one of the assets I needed to figure out was the elusive emitter. As it turns out it is not as mysterious as I once thought, and now I will describe to you how to make your own.
If you haven't already please learn the basics as I will be using the same tools and folder structures as well as give you an understanding of what I am talking about when I center a Group, Texture, Export, and Blueprint.
How do we start? I had to do some poking around to see how RSC made their emitters I found out that they used a model called a Gizmo, it had a texture, and there was a blueprint type for emitters. The gizmo is the simplest. Call it an anchor for the blueprint to work from, just like a light object. It will show in the editor, but not when running the game. Lets start with an inverted Cone.
Open 3DC and place a cone in the world. We will not need it a foot wide and high, so scale it to half its size (0.5, 0.5, 0.5).
For the texture we need a dummy (BMP and ACE). Make a 32px x 32px bitmap and flood fill the cone (I face painted the top). If you want you can use the bitmap and ACE file from the Basic tutorial to save time. Note that I didn't change the Diffuse, or Ambient or even set a shader. The reason is that the game engine will not render this model, so it does not matter.
Rename the Group to something readable '1_0200_DieselExhaust' (honestly LOD doesn't matter for this... its the gizmo after all). Save your work, and export it to IGS. Go ahead and close 3DC. We need Photoshop now.
The texture for the smoke is a titled set of 16 images 4 x 4 in a 256px x 256px 32bit bitmap. This is very similar to how terrain textures are used in game. The RGB layer is used for the color of the emission and the alpha channel will provide the shape (its a dropout layer). Like RSC I will fill in 6 of the 16 squares, giving each the same puffy grayish black cotton ball (yes I copied and pasted).
For the alpha channel I used a light gray brush to make the initial drop out and then added a white brush in the center to show some depth. Save this as an ACE, with 10 MIPs.
You can close Photoshop now. Its time to blueprint.
In my Railworks Source folder I create this folder structure: 'TGC\Tutorials\Particles\textures'. Both my ACE files will go into the 'textures' folder. The IGS file will be copied one folder up to Particles.
Time to fire up the Asset Editor. Right click on the Particles folder, not the IGS and create a emitter blueprint.
Fill out the following in the blueprint:
Name: A nice name
Display name: Name shown in the object browser
Description: Details about the object
Category: Misc (though you could exclude it from browser)
For the rest of the values I copied what RSC has for theirs, since I have little knowledge of how they work. In the future I may blog again to share my findings. Here are the values that should change, leave the others as default.
I max particles: 600
I particles to release: 1
B restart emitting: True
V int velocity: 1, 4, -1
V Gravity: 0, 1, -1
V 2 spread: 1, 1, -1
F velocity variance: 1
B switch color: True
Note: These are all shades of gray. From light to dark. Steam would be from light gray to white. Snow... just white?
Hc initial color
R: 0.356863
G: 0.356863
B: 0.356863
A: 0.066667
Hc mid color
R: 0.317647
G: 0.317647
B: 0.317647
A: 0.039216
Hc final color
R: 0.192157
G: 0.192157
B: 0.192157
A: 0.015686
F perc switch to mid color: 0.2
F size: .25
F final size: 1.5
F life cycle: 2
V spin axis: 1, 1, 1
B randomize texture: True (I suspect if you say false it will run the textures in order... would be interesting)
Tex ID: This is the path to the 16 index ACE. Right click on the texture file and pasted it into this box.
I row column size: 5 (0 is the first index and we have 6 textures).
Geometry ID: This is the path to our gizmo. Right click on the IGS and copy and paste the file name to this box.
Save your work, and Preview it.
Export it, and close the Asset Editor. Time to see it in real life. Place your emitter on the ground in your test route, and press the play button.
El Fin.
Now you have an emitter which can be added as a child to your models. If you are thinking you can repaint this, you are correct. Clone the gizmo and adjust the settings and the texture. You can make snow and steam emitters. How about trying to put some fire into those GE U-boats you know you want to make... though it may take some work to figure out... has to be that B randomize texture parameter.


No comments:
Post a Comment